Showing posts with label stitch. Show all posts

Wednesday, October 31, 2012

Halloween decorations---living room

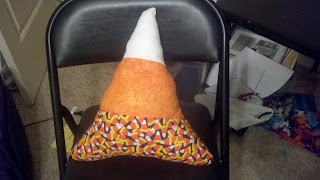
We had very few decorations in the living room.  We had a couple pillows that I posted pics of a while ago.  We also had a tiny grim reaper and a ghost that I made.


This ghost was fairly simple to make.  Anyone can do it.  All I did was cut a circle thing into to pieces of fabric.  sewed each circle to a piece of square fabric.  I then sewed the pieces together. I left the underside of the circle open.  Stuffed the head, and hand stitched the hole closed. I used a sharpie for the faces (a diff face on each side).  Tore strips in the squares. It was simple, fast, and turned out nice!


you might also be interested in:



Halloween decorations---outside

 Outside our apt.  You can see my painted pumpkin stand, our carved pumpkins, garland, and my hubby's reaper! Oh, and my dog.


These are our pumpkins.  Mine is on the left, and Lee's is on the right.  Mine was a design from a book, I decided to do something a little more complicated than a smilie face.  My husband, lee, did a devil.  The weather turned warm here in utah and as a result, our pumpkins died fast! I took this picture after they were out for two days! On halloween night they looked like total crap, but, what do you do? normally its 30 degrees in oct.  not 70!!!!

Halloween decorations---towels

 These were so easy to make, I think I'll make some for thanksgiving, christmas, etc. I love how they make my kitchen more homey too. These were cheap too. I think I paid less than $10 to make these.  Most of the stuff was 70% off at Jo-Anns. 
For this one the towel was too big.  So I had to cut it in half.  I then pleated the towel at the cut end and sewed it into the fabric.  I doubled the fabric so it was like putting a glove on a hand when i put the towel in the fabric. I added a button to hook it! so simple.
This was actually the first one I made and I didn't make it real tall. It was enough to hang the towel, but not as much as the other.  This towel was also the right length that I wanted so I didn't have to cut anything. super simple, super quick!


Sunday, October 21, 2012

Halloween Costumes part 1

  I made my very own Patchwork Cloak.  This is my Halloween Costume this year.  Sorry, Pics aren't the best.  This took me a week to sew it all together.  Took me about a month to cut all the squares. I did the dogs costume about a month or two ago.  That one only took me a day to cut and sew.  I still have to make my husbands cape. We are modern day Gleemen.  If you don't know what a Gleeeman is read the Wheel of Time series by Robert Jordan and Brandon Sanderson.  My husband read the series and got the idea.  I made my cloak for under 30 bucks.  You can buy similar coats for any amount....the most expensive I have found was in the $500 range.....I have not found one under $75.  This was made with absolutely no pattern.  I took my measurements....even those were used loosely.  I kept having to add and subtract squares as I was sewing.  For the sleeves I had to add a whole section to each to get  the shape I wanted.  I also used an old sweatshirt to mark the size of the sleeve whole I needed. It was a little big so I took in the shoulders a tiny bit to compensate. It was fairly easy to make.  Once all the squares were sewn together it took maybe 2.5 days to sew it all together.  It was fun and easy.  I lined the whole thing with plain black cotton fabric. I can't wait to finish Lee's and post pictures of all of us in our costumes. 


Sophie in all her glory modeling for the camera!!!

Monday, August 27, 2012

How to make: Travel pillow!

This is my first tutorial I have done so hopefully it is easy to understand.  Also, I don't really have a pattern, nor do I know how to upload patterns or I would have one. 

I made a travel neck pillow for my husband.  It was very simple and took maybe an hour.  The first thing you need to do is gather materials:  Fabric, Thread, Sewing machine, Stuffing, needle.  This is a very cheap project.  Depending on the size of the pillow you want to make you shouldn't need much fabric.  I got 1 yard and it was more than enough.  I also only used 1 type of fabric, for this project you could do different types, but I went simple. 

 Step 1:  fold fabric in half, right sides together.


Step 2: fold fabric in half again.  You should now have a square.
Step 3:  Draw out, either on seperate paper or fabric, the shape you want the pillow to take. I used wax paper to draw mine on.  Then, if you did what i did, pin paper to fabric on fold.  Not the double fold side....the single fold side.
 Step 4:  Cut fabric.  I cut the fabric a little bigger than the shape I drew because I just wanted a general idea of the shape....not the actual size.  Also, If I would have done it to the actual size I drew it, then I would have a pillow small enough for a kid.
 Step 5: unpin paper, unfold fabric.  Make sure your right sides are still together and pin the two sides together.
 Step 6: sew around the whole pillow.  Make sure to leave an opening somewhere to flip the fabric and stuff the pillow
 I double pin like this where my opening will be so I don't forget about it. 
 Step 7:  Clip your turns.....apparently this is important, not sure why but every tutorial I have read on rounded items says to do this, so I do....I get it on garments, but not pillows.  Oh well, do it anyways.
 Step 8: Flip it right side out.....
 This is what it should look like at this point.....
 Step 9: Iron the pillow.
 Step10: Find a fill you want, I used this:
 .....and stuff your pillow.  This was probably the most time consuming part.  Make sure you stuff it as full as YOU want it!  Test it out before sealing the hole.  Stick it on the floor or table and lay on it to make sure it is the right firmness.
 ....As you stuff you will see it take shape. 
 Step 11: Thread a needle and handstitch the opening shut.  Depending on the size of your whole you left.....this could take a while too. 
And Bam.....In less than an hour you have yourself a pillow.  Take it with you on your next trip.  Stay comfy cozy on a plane, in a car, or just sitting outside in your lawn chair reading a good book. 


I hope you enjoyed this tutorial.  I just figured since I couldn't find anything online that I would post something.  I know it's not difficult, but it's fun!