I took a day off to relax then got back to the finishing touches today. It took just shy of 3 hours to finish everything! It's beautiful and me! I put the sleeves on, and the buttons. I washed it and its hanging to dry. NOTE TO SELF: this is a hand wash only item! washing it in the machine made it fray pretty bad. I definately need a surger!!! Im very pleased with the outcome and I have enough material left over to make another one. I think I just might and try to sell it. Well, here's the finished trench!
The buttons.....to keep with the mismatch theme I used 5 buttons, 3 of a dark color and 2 of a silver!
This is what happened after I washed it. It took almost two hours to cut all the fray off but I got it done! If anyone out there has tips for how to keep this from happening without a surger or burning all the edges I would love to hear them!!!
I'm new to sewing. This blog is all about the things I am learning to make. I will be making this into a second income for myself and this will be my major site! Enjoy what I have to offer!
Showing posts with label sewing. Show all posts
Thursday, April 4, 2013
Adventures of a Denim Jacket part 2
This is the second part of my denim trench! It's almost done. I put together the top piece and sewed it to the skirt. I also put together the sleeves at this point, but didn't take pics of them. during this process I had a needle snap. Part of it went in my eye. When that happen I closed my eyes and not paying attention the rest of the needle went through my finger. I ripped the finger out which of course caused it to bleed. :( However, I got the piece out of my eye and super-glued my finger shut and got back to sewing. I got lucky it didn't go through to the point that an er visit was necessary. Just a little rip. well, enjoy.
The injury, after I super-glued it. NOTE TO SELF: if machine starts to jam....don't force it! Just stop and figure out the problem...might save a finger (or eye).
Front of jacket
Back of jacket
Side view
The injury, after I super-glued it. NOTE TO SELF: if machine starts to jam....don't force it! Just stop and figure out the problem...might save a finger (or eye).
Front of jacket
Back of jacket
Side view
Friday, December 7, 2012
Candy Cane dress
So, I have decided I love coming up with new ideas! If you've been reading I have cut up a bunch of old t-shirts to make a quilt. well, in the process, I ended up with a bunch of scraps. I have taken a few of them and made myself a cute little dress. I didn't realize that it looked like a candy cane til after I made the dress. all I did was take a few of the bottoms of the shirts, sewed them together into strips, and now I have a cute dress for christmas! I might add straps or something but here it is.....my candy cane dress:
christmas PJs!
I have finally got our christmas PJs done! I did a pair of pants for him, and pants and a dress for me! It was really quite easy to make them all. For the pants all I did was trace a pair of PJ bottoms I already have, cut it out, and sewed the pieces together. There are tons of tutorials out there showing you exactly how to do it. Most of them are for childs sizes but you can use the same technique for adults, I did! For the dress I used an old tank top and made it longer. I also went with a square neck instead of a rounded neck. I had fun making these. I love seeing things come together!

His pants.....
<<close up
far away>>>>
showing off pants the whole thang the dress

His pants.....
<<close up
far away>>>>
showing off pants the whole thang the dress
Friday, November 23, 2012
Pet placemats
I made cute little place-mats for my pets. I have a cat and and dog. They are both christmas place-mats so I will need to make more after the season is over. I know its the norm, but I made a fishy for the cat and a bone for the dog. I'm not the best at drawing so they are perfect but they turned out alright I think. They do not have batting in them because I figured the pets don't need it. Hope you like them!
just some accesories!
I've made a couple of things all of you readers out there might enjoy. The ideas are not entirely my own, yet again. but I made them me! The first is a wallet. It is 90% jean, the lining is just a plain cotton. I used a couple different shades of jean. a darker on the outside and a lighter on the outside. I'm thinking of adding an applique or some bejeweled stuff or something to spice it up a bit and make it less plain. It was fairly simple, however between the layers and the thickness that is jean, it got very difficult at times. The tutorial I used for my wallet is at THIS site! it's very simple to follow. Here are a couple pics of mine:
The next item is a tote! completely jean! completely my pattern. I used the whole top portion of some jeans. I then added strips of various other colors and styles of jeans at the bottom to give it something different. I also took the opportunity to practice different stitches to see what the look like. I also didn't seam everything the way everyone normally does. for the panels i just overlapped them and stitched them together. the idea is to get a somewhat frayed effect over time. I have already used this tote once. I don't need it for everyday. However, I needed something big because the movie theatre in town quit selling mountain dew and good candy.....therefore, i need a bag to sneak some in. I used it to hold 2 bottles of soda, 2 bottles of water, and 6 packages of candy. It was heavy as heck, but it held up very nicely. I also made the strap way to long, so I knotted it and I like it, it added something different. Here is a front and back picture:
Well, I hope you enjoy my accessories! I love making them and I love working with jean! It's so much fun to tear up the jeans that laugh at me because they don't fit! It's so much fun to come up with ideas or even to used old ideas!
Thursday, November 22, 2012
advent calendar
This is my advent calendar! I made it, if you couldn't tell. It was quite easy. My inspiration for this project came from THIS one. again, I couldn't find a how-to. so i used a tutorial to learn how to do a pillow case and I chose the envelope style pillow case because it looked easy! The whole case is satin. I had a set of satin sheets and used those. the Belt is removable using velcro and is just plain fabric with that stuff you used for tote straps inside to give it stiffness. All the writing was done with fabric markers! My embroidery on my machine is too small, so I hand wrote. I also added a fabric belt buckle and fabric loops. the idea is to slide the belt each day as you get closer to christmas! I was excited to do this one. hope you like it!
holiday chairs
Everyone loves a little holiday cheer. So how about dressing up your kitchen chairs for the season. I saw this idea all over the internet. All the sites I saw these on were to buy them for outragous prices. Then again, I'm a poor retail worker. I can afford fabric on sale but not the covers. I could not find a tutorial anywhere for these, so I kind of made it up as I went. My inspiration can be found on THIS site. I'm pretty sure the price is $30 each. so for a set of 4 you are spending over $100!! I have four kitchen chairs, not 1! So I took fabric I already had and made it up. Mine aren't nearly as professional or as good. As a matter of fact, one of mine started tearing apart in the washing machine! Teaches me to do a small seam on satin! But, I hope you like these. This is the first finished project for the holidays I have. I love how easy these were to make. If anyone wants to know how to make their own let me know and I'll post a tutorial when I make my next set!
This is the whole set. The pics below are close ups of each snowman.
this hat is shiny!
This is the one with the satin ribbon.....not my fav. But it's also my first one made.
This hat is shiny too.
This one is probably my favorite cause it's so different and so fun!
This is the whole set. The pics below are close ups of each snowman.
this hat is shiny!
This is the one with the satin ribbon.....not my fav. But it's also my first one made.
This hat is shiny too.
This one is probably my favorite cause it's so different and so fun!
Labels:
advent,
chair cover,
Christmas,
countdown,
decoration,
holiday,
sew,
sewing,
snowman,
snowmen,
winter
Wednesday, October 31, 2012
Halloween decorations---living room
We had very few decorations in the living room. We had a couple pillows that I posted pics of a while ago. We also had a tiny grim reaper and a ghost that I made.
This ghost was fairly simple to make. Anyone can do it. All I did was cut a circle thing into to pieces of fabric. sewed each circle to a piece of square fabric. I then sewed the pieces together. I left the underside of the circle open. Stuffed the head, and hand stitched the hole closed. I used a sharpie for the faces (a diff face on each side). Tore strips in the squares. It was simple, fast, and turned out nice!
you might also be interested in:
Halloween decorations---outside
Outside our apt. You can see my painted pumpkin stand, our carved pumpkins, garland, and my hubby's reaper! Oh, and my dog.

These are our pumpkins. Mine is on the left, and Lee's is on the right. Mine was a design from a book, I decided to do something a little more complicated than a smilie face. My husband, lee, did a devil. The weather turned warm here in utah and as a result, our pumpkins died fast! I took this picture after they were out for two days! On halloween night they looked like total crap, but, what do you do? normally its 30 degrees in oct. not 70!!!!

These are our pumpkins. Mine is on the left, and Lee's is on the right. Mine was a design from a book, I decided to do something a little more complicated than a smilie face. My husband, lee, did a devil. The weather turned warm here in utah and as a result, our pumpkins died fast! I took this picture after they were out for two days! On halloween night they looked like total crap, but, what do you do? normally its 30 degrees in oct. not 70!!!!
Halloween decorations---towels
These were so easy to make, I think I'll make some for thanksgiving, christmas, etc. I love how they make my kitchen more homey too. These were cheap too. I think I paid less than $10 to make these. Most of the stuff was 70% off at Jo-Anns.
For this one the towel was too big. So I had to cut it in half. I then pleated the towel at the cut end and sewed it into the fabric. I doubled the fabric so it was like putting a glove on a hand when i put the towel in the fabric. I added a button to hook it! so simple.
This was actually the first one I made and I didn't make it real tall. It was enough to hang the towel, but not as much as the other. This towel was also the right length that I wanted so I didn't have to cut anything. super simple, super quick!
For this one the towel was too big. So I had to cut it in half. I then pleated the towel at the cut end and sewed it into the fabric. I doubled the fabric so it was like putting a glove on a hand when i put the towel in the fabric. I added a button to hook it! so simple.
This was actually the first one I made and I didn't make it real tall. It was enough to hang the towel, but not as much as the other. This towel was also the right length that I wanted so I didn't have to cut anything. super simple, super quick!
Sunday, October 21, 2012
Halloween Costumes part 1
I made my very own Patchwork Cloak. This is my Halloween Costume this
year. Sorry, Pics aren't the best. This took me a week to sew it all
together. Took me about a month to cut all the squares. I did the dogs
costume about a month or two ago. That one only took me a day to cut
and sew. I still have to make my husbands cape. We are modern day
Gleemen. If you don't know what a Gleeeman is read the Wheel of Time
series by Robert Jordan and Brandon Sanderson. My husband read the
series and got the idea. I made my cloak for under 30 bucks. You can
buy similar coats for any amount....the most expensive I have found was
in the $500 range.....I have not found one under $75. This was made
with absolutely no pattern. I took my measurements....even those were
used loosely. I kept having to add and subtract squares as I was
sewing. For the sleeves I had to add a whole section to each to get
the shape I wanted. I also used an old sweatshirt to mark the size of
the sleeve whole I needed. It was a little big so I took in the
shoulders a tiny bit to compensate. It was fairly easy to make. Once
all the squares were sewn together it took maybe 2.5 days to sew it all
together. It was fun and easy. I lined the whole thing with plain
black cotton fabric. I can't wait to finish Lee's and post pictures of
all of us in our costumes. 
Sophie in all her glory modeling for the camera!!!
Tuesday, September 11, 2012
My dress form--tutorial
So I have been seeing people online have been making their own dress forms out of all sorts of things. After finding this out, I decided to give it a try. I won't really know how it worked til I make some clothes. However, I think it looks alright. Well, I decided to do my own tutorial. Hopefully this will help anyone out there who, like me, is in need for a dress form but is poorer than poor.
THIS is where I got the idea!
Make sure you do a couple things first.....where a bra and a "tight" under shirt.
So lets get started. You need to start with materials. You need a shirt that is too large for you, for me I got a men's XXL T-Shirt from walmart (on sale for $3). You also need some duct tape. Depending on your size you shouldn't need more than 2 rolls. I bought 3 just in case. I only used 1 on the form and part of one for the end of the project. You also need some cardboard for stabilizing and some stuffing......
This is my shirt and tape.
You also need your trusty helper.....can't wrap yourself in duct tape. I chose my husband!
For cardboard.....I went and got some from work (walmart). and the stuffing came from old pillows that aren't being used.
Start wrapping the duct tape from. Start and the lowest point you want the form. I have a big butt so I started there. You can start lower or higher, depends on your shape.
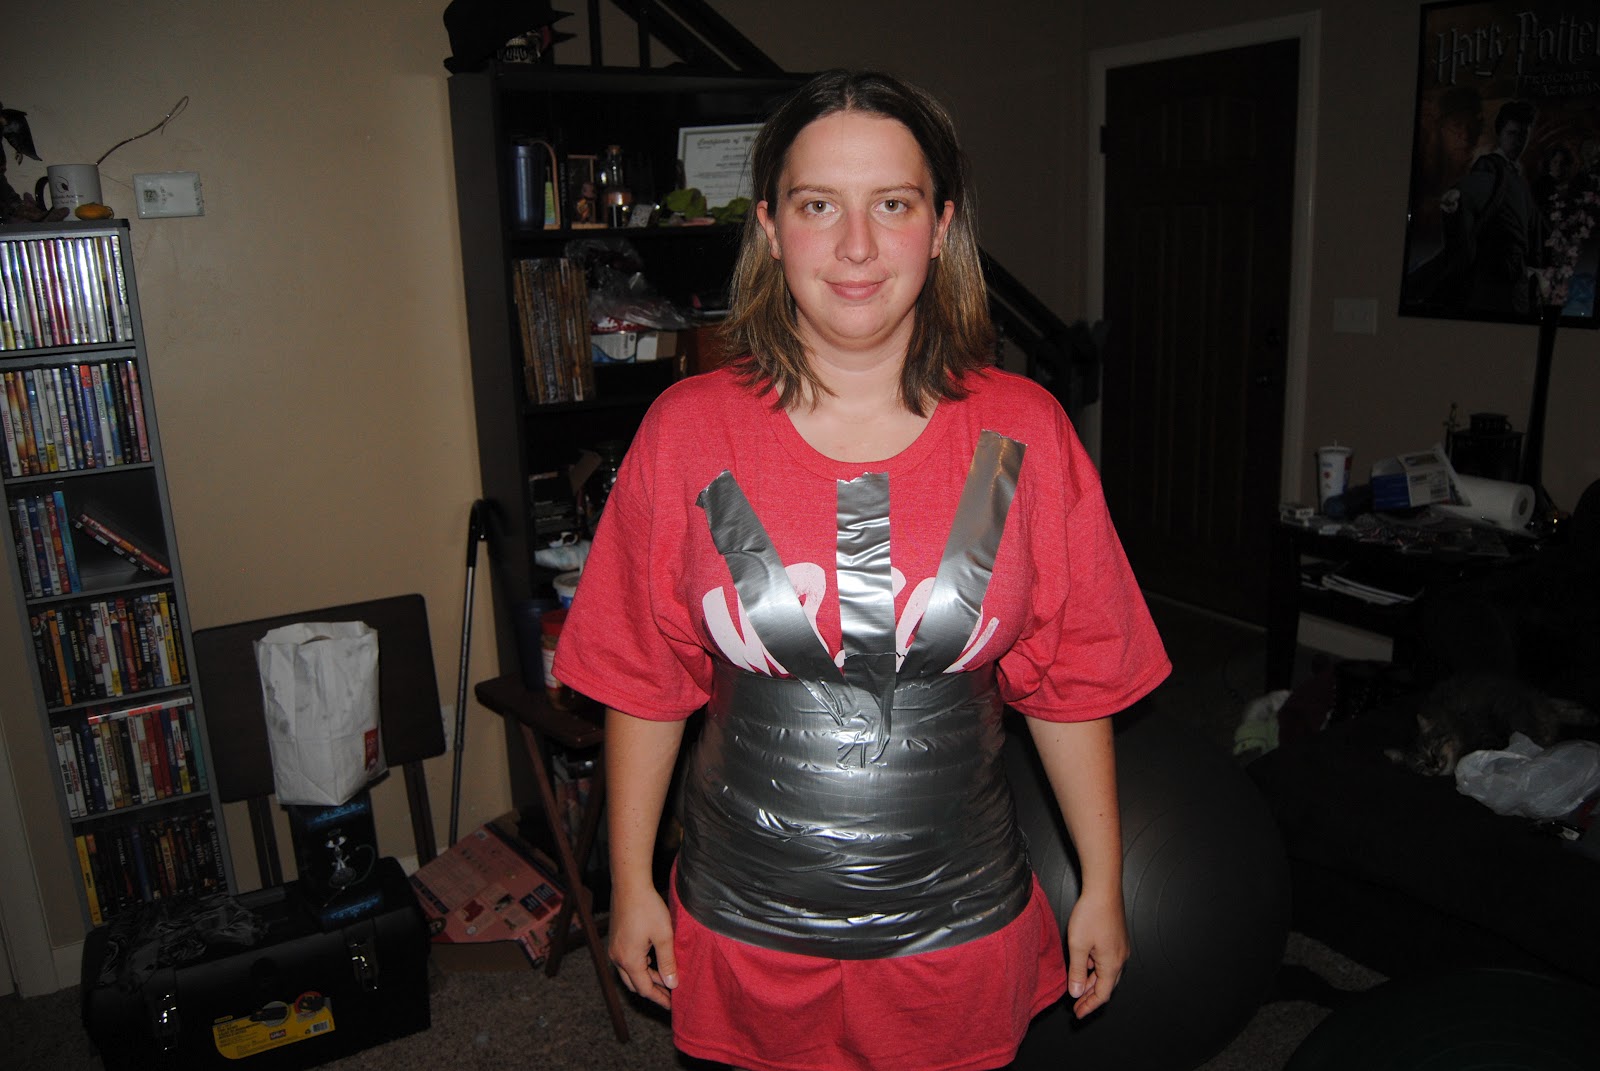
When you get to the chest, start wrapping the tape up and down instead of around. The up and down wrapping helps form the chest better. I tried going around, but it made the chest look flat.....up and down is definitely best.
Keep doing the up and down wrapping over your chest, shoulders and upper back.
While doing this, form the neckline you want and the arm holes.
When you get it wrapped to your satisfaction, draw and line down the center and and horizontal lines where you want them. I did one across the center of the chest, under the boobs, and across my belly button.
Very carefully, cut the form off on the back. Make sure not to cut the shirt or bra when you are cutting this. After you cut slip the form off very carefully and, without overlapping, carefully tap over the cut to finish your form.
Cut out the cardboard to fit the bottom of the form and tape it to the form (sorry no pics of this). then stuff your form from the top. You can also put card board in the arm holes to help those keep shape. Where this is my first form I was getting tired so I didn't do that part.
When you are done with your form it should look a little like this.
You can stick a hanger in the top to hang it....which is what I plan. I am going to put a hook in the ceiling and hang it from that when using and putting it in the closet when I'm not. OR, you can make a pole out of cardboard or whatever and afix your form to that. I'm not that handy so you can figure that out.
I hope my dress form works out for me. I'm going to be making my first item using it tomorrow! I'm going to be making a jumper so look out for another tutorial. It'll be great if this works. I am looking at getting a dress form from amazon at some point.....one of those adjustable ones. But for now, this should work. Hope you enjoyed the tutorial and hope it helps you make your own dress form!
THIS is where I got the idea!
Make sure you do a couple things first.....where a bra and a "tight" under shirt.
So lets get started. You need to start with materials. You need a shirt that is too large for you, for me I got a men's XXL T-Shirt from walmart (on sale for $3). You also need some duct tape. Depending on your size you shouldn't need more than 2 rolls. I bought 3 just in case. I only used 1 on the form and part of one for the end of the project. You also need some cardboard for stabilizing and some stuffing......
This is my shirt and tape.
You also need your trusty helper.....can't wrap yourself in duct tape. I chose my husband!
For cardboard.....I went and got some from work (walmart). and the stuffing came from old pillows that aren't being used.
Start wrapping the duct tape from. Start and the lowest point you want the form. I have a big butt so I started there. You can start lower or higher, depends on your shape.
When you get to the chest, start wrapping the tape up and down instead of around. The up and down wrapping helps form the chest better. I tried going around, but it made the chest look flat.....up and down is definitely best.
Keep doing the up and down wrapping over your chest, shoulders and upper back.
While doing this, form the neckline you want and the arm holes.
When you get it wrapped to your satisfaction, draw and line down the center and and horizontal lines where you want them. I did one across the center of the chest, under the boobs, and across my belly button.
Very carefully, cut the form off on the back. Make sure not to cut the shirt or bra when you are cutting this. After you cut slip the form off very carefully and, without overlapping, carefully tap over the cut to finish your form.
Cut out the cardboard to fit the bottom of the form and tape it to the form (sorry no pics of this). then stuff your form from the top. You can also put card board in the arm holes to help those keep shape. Where this is my first form I was getting tired so I didn't do that part.
When you are done with your form it should look a little like this.
You can stick a hanger in the top to hang it....which is what I plan. I am going to put a hook in the ceiling and hang it from that when using and putting it in the closet when I'm not. OR, you can make a pole out of cardboard or whatever and afix your form to that. I'm not that handy so you can figure that out.
I hope my dress form works out for me. I'm going to be making my first item using it tomorrow! I'm going to be making a jumper so look out for another tutorial. It'll be great if this works. I am looking at getting a dress form from amazon at some point.....one of those adjustable ones. But for now, this should work. Hope you enjoyed the tutorial and hope it helps you make your own dress form!
Subscribe to:
Posts (Atom)